Tuesday, 11 November 2014

New Course - Clear Cut: Beginners Paper Cutting


Since Rob Ryan won our hearts with his romantic, intricate creations we've been swooning over the art of paper cutting. Check out some serious eye candy here and whet your appetite with a quick run down of our favourite inspirational artists:
Rob Ryan, Grandaddy of modern paper cutting and star crossed lovers. His work moves me to tears!

Manchester-based Helen Musselwhite is surely the undisputed Queen of paper cuttery. Take a look at her website and be COMPLETELY STUNNED!
We came across the work of Helen Rees recently, at the Great Northern Contemporary Craft Fair. Her work often reflects the Welsh landscape where she lives but she also does portraits!


The newest addition to our team of craftacular tutors is Jess Panesar who makes bespoke, personalised paper cuts to order. Check out her work!
Now you can literally take a leaf out of Jess's book: grab a scalpel and a slice of the action! We're thrilled to be launching our first paper cutting course - CLEAR CUT: BEGINNERS PAPER CUTTING - on Sunday 30 November. It's a snip at £32.50, so there's no reason not to delve into this wonderful art form. For booking and further details click here.

{Personalised paper cut, just for us, by Jess Panesar}

We've also got tonnes of papery goodness over on our Pinterest boards. So after you've dipped your toe in the water under Jess's expert tuition, you can start making your original hand cut Christmas cards or personalised art works. There's so much inspiration our there, plus templates and free tutorials to keep your hand sure and steady.

We look forward to seeing your creations!

Thursday, 23 October 2014

Super Spooky Tutorial Round Up - Our 5 Fave Halloween DIYs


Halloween is possibly my favourite day of the year so, predictably, our Pinterest board is groaning under the weight of horrifically easy and terrifyingly cute ideas for DIY costumes, decorations and treats. Here are my favourites but do check out the whole selection. Not all are suitable for kids, but most of them are!

1. Pumpkins are the mainstay of Halloween, but if you want to hide from trick or treaters this year, and secretly craft behind your closed curtains, then why not sew up this cute pumpkin pin cushion?
from usefulDIY.com
2. Obviously it’s a given that something MUST be carved, so after you’ve whittled your traditional jack-o-lanterns, get out your sharpest knife and have a go at this super gross watermelon brain
from instructables.com
3. I’ve pinned lots of ideas for DIY treat bags on our Pinterest board, but I love these trick or treat candy collection buckets. Old paint pots, duct tape, cardboard. Boom!

4. As a busy mum, I’m a fan of the VERY quick and last minute costume ideas (there’s loads on our board) but this Owl Costume for kids with fabric feathered wings is something to take your time over and keep forever.
5. Liven up your party: add simple cardboard black cats to your existing Christmas fairy lights and drape throughout your venue, or pin them up outside your house to attract the trick or treaters.
Found on http://mycakies.com
Follow us on Pinterest for more creative DIY ideas, or sign up to one of our courses to increase your crafting confidence; we offer courses in sewing, knitting, crochet, printing, jewellery making. And if you’ve got any excellent Halloween hacks or despicable DIYs then please do share them with us on Pinterest, Twitter, Instagram or Facebook.

Happy Halloweening!

Friday, 17 October 2014

Great Northern Contemporary Craft Fair - Our Top 10 Finds

Last Thursday we rubbed shoulders with the glitterati of the craft world at the preview evening of the Great Northern Contemporary Craft Fair. In the post-industrial chic of the Old Granada TV studios we browsed the stalls, chatted with the makers, coveted the amazing products and made some sound investments!

We hope you were able to attend over the weekend, but if you didn’t manage to get there here’s our round up of our favourite finds and people to watch. You can find each maker’s work online and we hope we might influence you to check them out. Start your Christmas wishlist here!

1.    Lynsey Walters – Both Sam and I have bought Lynsey’s joyous felt jewellery at previous fairs and this year was no exception. Always a favourite!

2.    Vinegar & Brown Paper – ideas etched in glass! We loved this stall. Vintage mirrors, inkwells, conical flasks, crystal decanters all etched with simple messages. A brilliant idea for a bespoke gift. Thoughtful and unusual.

3.    Jules McKeown - Yuyu is a modern interior brand creating original collections of bold surface pattern designs across a range of fabrics, cushions, wallpapers and limited edition screen prints. All products and fabrics are beautifully made in the UK.

4.    Bella May Leonard – contemporary embroidery as art, as well as embellishment.

5.    Sarah Heaton – Whimsical, lovable, usable ceramic tableware.

6.    Anna Byers – Statement jewellery including interactive pieces with moveable parts. My favourites were the geometric pieces made from Perspex and precious metals. Swoon.

7.    Laura Lou – completely charming kitsch textile jewellery

8.    Graeme Reed – illustrator from Stoke-on-Trent selling limited edition digital prints 

9.    Amy Lawrence Designs – Knitted artisan jewellery inspired by nature and traditional cultures. I could have bought the whole collection!

10.    Ruth Pullan – hand-stitched leather satchels and bags. British materials and traditional craftsmanship.


If you need any further inspiration for your Christmas list, just remember we have Ministry of Craft gift vouchers. So you can treat your nearest and dearest to the gift of a craft course, or more realistically, they can treat you!

Friday, 10 October 2014

New Course - Classy Clutch Bag


There’s no denying that the clutch bag is the mainstay of the festive season. With so many nights out and parties you need a little faithful friend to keep all your important things together and add a splash of colour to your outfit. Clutch bags come in many different shapes and sizes, here are some of our current favourites from the highstreet…
Vintage Kimono Wool clutch £48.19 | From Etsy | FABbyCAB


Recycled Sari Clip Clutch £20 | from People Tree

Beaded Pick 'n Mix Pouch £495 | from Selfridges | Charlotte Olympia


Next month Ministry brings you the opportunity to make your very own custom, one-off, no-one-else-is-going-to-have-it clutch bag with our brand new CLASSY CLUTCH BAG course. Classic colours, or bright and bold, you decide! Your new clutch will set your outfit off to perfection.

Oh this? I made it myself!

The next Classy Clutch Bag course is on the 22nd November and costs just £42.50, (cheaper than some of the featured bags above, and for that you get a finished clutch PLUS the skills to make all the bags you could ever need!) 

This course is bound to be popular so book yourself on ASAP and start shopping for the perfect fabric immediately.

Monday, 15 September 2014

Tutorial Round Up - Our 4 Fave Patchwork Tutorials

I'm starting to feel a hint of autumn on the breeze this week. I might even turn on my central heating and indulge in a spot of patchwork and quilting to stave off the wintery blues.

If you'd like to do the same, here are our favourite patchwork tutorials from our Pinterest pages...

1. Heres a very cute and easy way to start: A Quick Pieced Pincushion from Very Berry


2. Suitable for beginners and favouring the wonky 'log cabin' style we love this slick but relaxed-looking Modern Log Cabin Patchwork Pillow by Brett Bara


3. Spooktacular 'Quick and Easy' Large Hexagon Halloween Quilt from Polkadotchair

You'll need to be up to speed with patchwork and quilting terminology for this tutorial but it's a good one for testing your quilting mettle. Also very nice to see the Autumn colours of Kentucky USA!


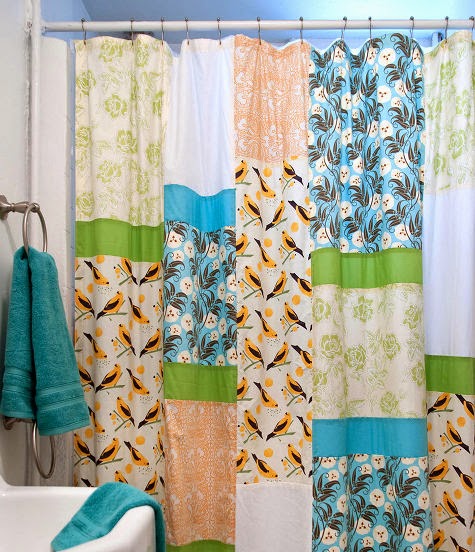
4. A shower curtain. Yes, a shower curtain. Expertly designed by Brett Bara with the intention of distracting the eye away from the rest of her grungy bathroom!


Perfect patchworking projects for Autumn. If you'd like to learn patchwork and quilting in a classroom setting, rather than from online tutorials, then check out our forthcoming Snuggle Quilt and Patchwork Bag courses here.


Friday, 12 September 2014

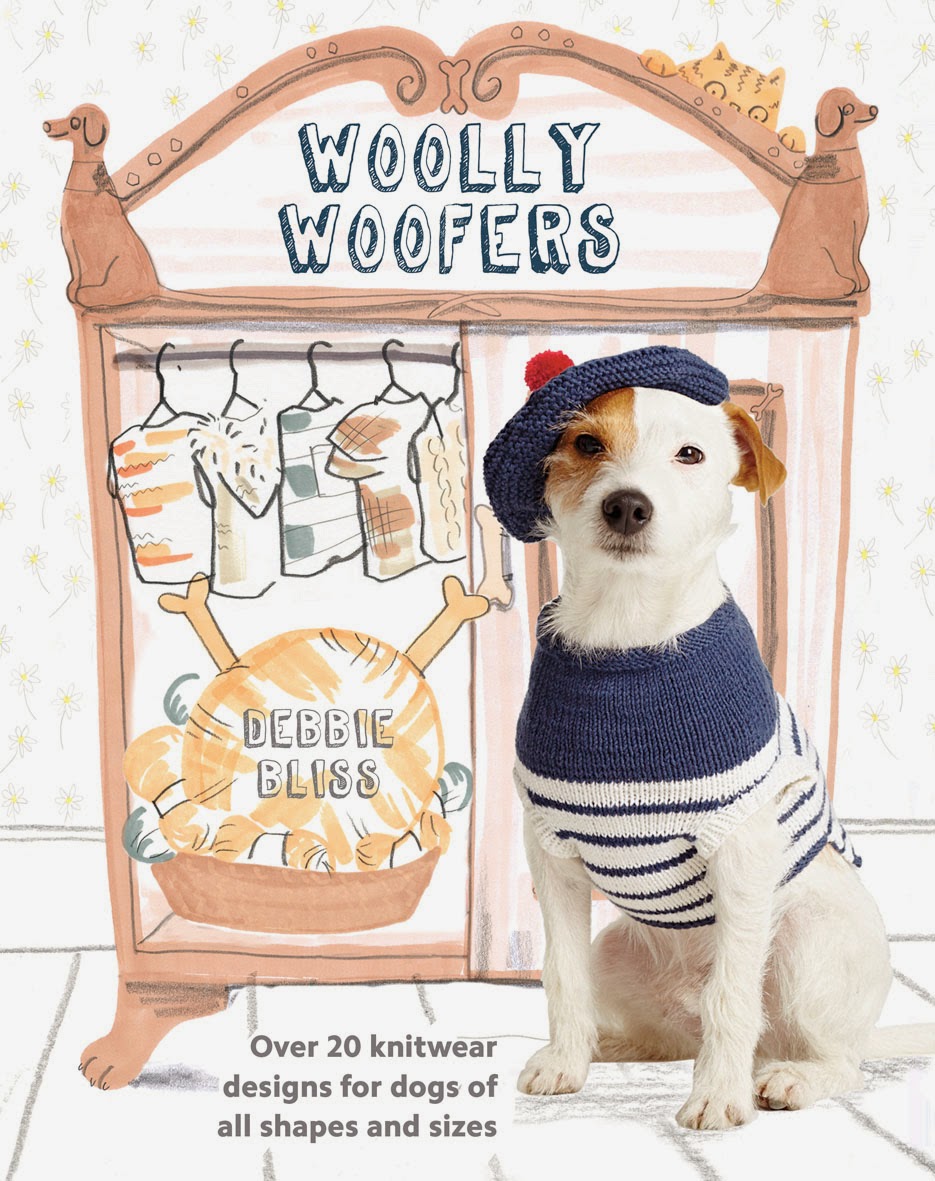
Book Review, Giveaway & Free Pattern - Woolly Woofers by Debbie Bliss (Quadrille, £14.99)

A long time ago I bought a Debbie Bliss book full of beginners knitting projects suitable for babies. I knitted a simple scarf in beautifully soft Debbie Bliss wool and my daughter still wears this scarf years later. So thank you, Debbie for igniting my passion for knitting.

And thanks to Debbie once again for her newest book launching today. I can honestly say that Woolly Woofers will have dog lovers everywhere howling with delight. Knitting for dogs has NEVER been so chic!


Woolly Woofers is a collection of over 20 knitwear designs for dogs. There are patterns for dogs of all shapes and sizes so there's something for everyone. I love this book, I don't have a dog, but I know people who have dogs, love dogs and also love knitting. And this is what I will be buying them for Christmas this year.

The book is lovely, kitsch sure but tastefully designed too, and filled with super adorable outfits to make...

...such as the colourful Mardi Gras Mutt...

...or perhaps you're more of a Puppy Polo...(I would wear this myself)...


...please someone, ANYONE, make the Pierrot Hat and Ruff. I guarantee that if you make these for your pooch and take him for walkies you will be treated as a celebrity. It must be knitted up instantly.


To celebrate the launch of Woolly Woofers by Debbie Bliss, the lovely publishers Quadrille, have given us a copy to give away. If you'd like to get your paws on a free copy just follow the link here. I'll draw a name out of a hat next Friday (19 September), and announce the winner.


We're also encouraging everyone to share photos of their dogs in their new outfits using the hashtag #WoollyWoofers. If you'd like to road-test one of the patterns from the book we have an exciting, exclusive FREE DOWNLOAD of the ever so tasteful Good Boy Gansey cabled coat. You lucky mutts!


If you're a novice knitter and you'd rather learn the basics first, then why not come on one of our beginners knitting courses, taught by the super awesome Rachael Gwilliam (Art Yarn)? Check them out here.

Now go forth and spread the word! Download the pattern! Enter the give away! Buy the book! Share your photos!

And enjoy your weekend.


Woolly Woofers by Debbie Bliss (Quadrille, £14.99)
Photography: Richard Burns

Friday, 5 September 2014

Ministry of Craft Tutorial - DIY toadstool wedding cake toppers


This summer I had the pleasure of tutoring a wonderful woodland wedding themed hen party. We made these cute toadstool champagne cork toppers which will be used at the wedding venue as place card holders, wedding cake toppers and even favours. We made loads in one go, you can do the same or just make a couple. You’re only limited by how much champagne you can drink!


Here’s how you can make them yourself at home:


Ingredients:
Champagne corks
Red acrylic paint
White acrylic paint
Kebab sticks or similar
Medium sized paintbrush with flat head
Thin paintbrush with rounded head
Stiff wire
Wirecutters
Natural craft card
Black Sharpie marker
Scissors or craft knife
Glue


Ready Steady Go!
After polishing off a few bottles of your favourite fizz (well, it would be rude not to) steady your corks by inserting your sharp kebab stick firmly into the end, as shown. This will allow you to paint all the way round without touching the cork with your fingers.

Squeeze a small amount of each paint into separate receptacles. Don’t add any water to your paint or brush, you want the paint to be as thick and opaque as possible. Using your round headed brush paint the bottom of the cork with the white acrylic paint to create the ‘stalk’. Spread the paint as evenly as you can and avoid blobs of paint which will take ages to dry. When you have finished use a milk bottle or similar to stand your cork in while it dries. Leaving each colour to dry completely is crucial so that you don’t accidentally mix the paints together. You don’t want red and slightly pink toadstools!


Next, using your flat headed brush, paint the top part of the champagne cork with the red acrylic paint, taking care to make a neat line where the red meets the white. And then leave it to dry.


Watching paint dry
In the mean time you can make name cards or flags to go into the top of your toadstools when they are finished.

I made mine by cutting a flag shape out of some natural craft card and gluing it to a 2 inch length of stiff wire. You could make yours in any shape you like but they work best when they are double sided and the end of the wire is sandwiched between them out of sight. This way they look good from all angles too!


Autumnal cheer
When the red paint is totally dry, use the round ended paintbrush again to add polka dots of white paint all over the top of your toadstool. Be generous with the white paint here. It looks good if the spots have a bit of texture to them!

­­


Again, wait for them to dry completely before man handling them and adding the flags or name cards.

The finished toadstools will add a bit of fun and colour to your wedding banquet, tea party or cake stall.


If you’d like Ministry of Craft to run a workshop for your hen do, party or corporate event then check out our party page and get in touch. If you’d like to share photos of your makes you can join us on facebook , twitter, pinterest and instagram. Don’t forget to tag us in your posts and use #ministryofcraft so we can see what you’re all doing!

 Bottoms up!