Monday 23 June 2014

Meet our talented tutors - Deborah Simms - Hand Embroidery

Introducing...

Deborah Simms is our hand embroidery specialist. She's a keen crafter of many disciplines, but sewing just floats her boat. She even made her own wedding dress! Which is testament to her skill and creativity. You can learn the peaceful art of hand embroidery with Deborah at Ministry of Craft, and it's completely suitable for beginners. Read on to find out more about Deborah's crafty habits... 

What first drew you to your craft? 
I really enjoy hand sewing as it’s such a calm break from day to day life. My mum always embroidered when we were young so I must have picked up my enjoyment of it from her. 

What’s your crafting background?
I have been sewing in one way or another since I was very young, and have dipped into all sorts of things from knitting and crochet to clothes sewing.

Did you train professionally as an embroiderer or are you self taught?

I have never trained professionally, but love to learn so have picked up stitches and techniques as I’ve gone along. I take inspiration from following blogs but much of what I know has been handed down to me from my mum. 


What are your main sources of inspiration?
I love to make brightly coloured embroideries, to make art for my home which reflects what I love. For example, I stitched an umbrella design, (as I love the rain) lucky I live in Manchester! And a garden design on a cushion, as I love to get out in the garden when I can.  

Who’s been the biggest influence on your career so far?
My family, everyone is creative in their own way, and I love to chat with all of them about their different interests and crafts. 

What’s the best thing about being a crafter?
The opportunity to meet other people who enjoy being creative, and but to also have such a contemplative craft which I can use as a quiet time to be calm, it’s like my meditation. 

Do you do any other crafts in your spare time, apart from what you specialise in?
I love any and all crafts, so I knit and crochet, as well as sewing my own clothes and bits and pieces around the home. Anything to have a creative outlet!

What’s the best thing you’ve ever made?

The thing that I am most proud of is my wedding dress, it took months to complete but was definitely worth it. I love looking at it now as it reminds me of such a brilliant day, and of all the little finishing details which made it special

Have you ever made a creative mistake?
I make minor mistakes all the time! Strangely it’s one of the things that I enjoy most about being creative, making mistakes which you can work into your sewing. Making something entirely unique and working around any problems.

And your favourite tool or material?

Probably a piece of craft cotton, as it’s so brilliantly versatile. I can use it for clothes, embroidery, and around the house. And you can get such a brilliant variety of patterns, from lobsters to galaxies

What’s your favourite crafty anecdote / story?

Probably when I learnt how to French knit, it was one of the only things I could get my head round doing when I was young, so I used to just make miles and miles of it without stitching it together. I once measured it, hung it off the top of my stairs in the house… we made it out of the front door and round to the back of the house before we ran out of French knitting. I never did do anything with it, its sat somewhere in my sewing room waiting to be made into something spectacular.

Where can we see / buy your work?

Everything I do I blog at dfabricate.blogspot.com, unfortunately you can’t buy my items, but you can read all about my sewing and crafting exploits from extreme knitting to tackling the French knot

What have you got coming up in the future?

I’m hoping to set up some social sewing and crafting events in the future, to get out there and meet some of the super talented (and novice) sewers and crafters in Manchester! Watch my blog for further developments.

If you'd like to come and craft with Deborah then sign up for one of our Sew Simple: Introduction to Hand Embroidery courses (next one is Saturday 12 July). It's a great way to enter the world of sewing! You can also follow Deborah's exploits on Twitter @dfabricate, or on her blog at dfabricate.blogspot.com

Thursday 19 June 2014

Ministry of Craft Tutorial: Wigwam Thank You Ma'am!


Equipment

Meter rule (or long straight piece of wood for drawing long lines)
Flexible tape measure
6 m of brown paper, measuring 50 cm wide
Pencil
Paper scissors
Pins
Sewing machine
Matching thread
Fabric scissors


Materials
4. 6 meters of light or medium weight woven fabric
1 x 10 cm pieces of elastic
1 x 30 cm elastic 

2 x 40-50 cm pieces ribbon
1 x 40 cm ribbon
5 x 190 cm garden canes
2 to 3 rolls of washi tape

Cut fabric pieces required to make your Wigwam
4 x Side panel piece (from paper pattern)
1 x Front triangle piece (from paper pattern)
2 x Door Panels (from paper pattern)
5 x Pole covers (drawn directly onto fabric)

Before you start

Seam allowances are included in the pattern. Use a 1.5 seam allowance throughout unless stated otherwise. Press all your fabrics before you begin. Use either a large table or the floor for drawing out, laying up your fabric and pinning to give the best results.
1. How to draw out your pattern pieces 
To make your ‘side panel pattern’, cut two 150 cm lengths of brown paper. Overlap the two pieces by approximately 3 cm. Using small pieces of masking tape join the two pieces together. Then tape over the small pieces of tape with two or three long pieces, so the whole join is concealed. Fold the paper in two along the taped line and place on a flat surface with the thin strip at the top of the paper, furthest way from you. 

2. Keeping the paper folded, use the folded edge of the paper to create your pattern centre line and mark two points, 144cm apart, along its length. At one point, mark a 36.5cm line at a right angle to the centre line (bottom of your pattern piece). At the

other end mark a 4 cm line, again at a right angle to the centre line (top of your pattern piece). Draw down a line to the measured marks.

3. Join the ends of the two lines together using a meter rule or long piece of straight wood. If you find this tricky, stick your tape measure, using masking tape to the paper and draw a faint

pencil line along it. Then straighten this to create a solid line. Leaving the paper still folded cut through both layers of paper along the lines and unfold.

4. To make your ‘front triangle pattern’, cut two 60 cm lengths of brown paper. Join together and fold as in step 1. Using the fold as the centre line mark out 55.5 cm.  As before mark down at right angles to each end a 26.5 cm line and a 4 cm line which will form the top and
bottom of your panel. Join the lines together and cut out the pattern as in Step 3.
If using the layout in Step 6, keep the pattern folded and fold over the 3 cm overlap over
the centre line.

5. To make your ‘door panel pattern’, cut two 90 cm lengths of brown paper and join together with masking tape as in step 1, but this time leave the paper unfolded. On the left hand side straight long edge of the paper, mark two points, 86cm apart. At a right angle to the straight edge mark a 59cm line, (bottom of pattern). At the opposite end mark a 26.5 cm line, at a right angle to the straight edge
(top of pattern). Join the ends of the two lines together and cut along the drawn lines.

6. To layout your pattern pieces lay out your fabric on a flat surface and double over, with the selvedges (the edges of the fabric that do not fray) on top of each other. Based on 150cm wide fabric layout your pattern pieces as in the diagram. Pin the pattern pieces into place, through both layers of fabric and cut out carefully. The folded front triangle piece should be placed on the fold of the fabric. For the pole cover pieces, measure 14 cm x 147 cm rectangle straight onto your fabric using tailors chalk, pins or erasable fabric pen. Alternatively you can make a paper pattern using the pattern making steps as a guide.

7. If you are using different fabric for each panel and pole cover as we did, layout your
pattern pieces individually and cut out carefully. Ensure the centre line of your pattern piece is parallel to the selvedge.

8. To start constructing your wigwam, take the first of your side panels and at the bottom fold over a 0. 5cm hem, press and then fold over
another 1cm hem. Pin in place and repeat this on:
-    Top and bottom of all side panels
-    top and bottom of all pole cover pieces.
Trim off any fabric that is not flush with the sides.

9. Fill your bobbin full with cotton and thread up your machine. Using a straight stitch, stitch close to the top of the folded hem. Remember to backstitch (or reverse) at the start and finish of your stitching lines. 


10. Layout a side panel onto a flat surface, with the right side of the fabric facing upwards. Fold a pole cover lengthwise, with
the wrong sides of the fabric together. Then lay the folded pole cover onto the side panel, matching together the long edges.

11. Lay another side panel with the right side facing down on
top of the pole cover and again match the long edge. Pin to the fabric, along the long length. Open up the pinned sections and check that each piece has the right side facing the correct way before sewing.

12. Using a 1.5 cm seam allowance sew through all our layers of fabric using a straight stitch. To reinforce the
wigwam, sew a


zig-zag on the seam allowance stitch as close to the fabric edge as possible to prevent any fraying. 


13. When you have sewn four panels and three pole covers together, open out the partially constructed teepee and pin and sew the final two pole cover pieces, to the edges of the outer
panels. The finished result should look like this.

14. Lay the door panel with the wrong side of the fabric facing up wards. Along the straight long edge and bottom edge and press the same hem as in Step 8, creating a neat fold on the corner edge. Sew along the door opening side and stop

approximately 0.5 cm away from the corner.  Pivot with the needle in the fabric and turn the fabric to continue sewing along the bottom seam. Repeat on the remaining door and sew down the hem only on the top front triangle panel piece.

15. Join the two door panels to the front triangle panel by placing the right sides of the fabric together along the bottom long edge of the front triangle panel and the short top sides of the 2 door panels. Ensure that that the doors meet in the middle and the outside edges meet. Pin and sew the seam
closed to form a full
wigwam panel. Zig zag to prevent any fraying and press the seam upwards towards the top of the wigwam.

16. To attach the ribbon ties, find the halfway point of the open section of the door and pin a piece of ribbon to the back. Fold a
piece of the elastic in half and pin at the same position as the ribbon on the front of the door. Each piece should have at least a 1.5 cm overhang into the seam. Repeat on the opposite side of the door. Hand sew the elastic into place to secure.

17. To sew the door panel to the
wigwam, take the part constructed wigwam and pin the door panel to the furthest left
pole cover as in Step 12, and sew a joining seam. Pin the final pole cover to the remaining front panel and sew together. The final result should look like this.

18. To create matching canes, wrap Japanese washi tape down from the top of the cane approximately 45cm and approximately 21 cm at the bottom of each cane.
Push each cane into the pole covers and hold together firmly at the top. Around 20 cm from the top, wrap a piece of elastic around the canes twice and then knot.  Splay the canes until and position until the
wigwam is standing up of its own accord. Take a piece of ribbon and wrap around the elastic as a finishing touch.

    Top Tips
  • When sewing ties or ribbons into such a large project pin any dangling ribbon away from the seam to stop it getting sewn inside your seam allowance!
  • If using heavier weight fabric consider using a walking foot for your machine which has ‘teeth’ or ‘feed dogs’ similar to the bottom of your machine and will feed the layers of fabric through more easily.
  • If using a patterned fabric, think about the direction of the pattern and if this will effect the way you lay out your pattern pieces or if you’ll need more fabric to allow for this.
  • To speed up your cutting, make two side panels that you can then pin and cut in one go, instead of unpinning and re-pinning.

If you have a go at this tutorial please send us pictures of your finished wigwams. Or tag us on Twitter/Facebook/Pinterest/Instagram etc. Happy
crafting!

Friday 13 June 2014

Ministry of Craft Tutorial: DIY hand carved, hand printed Save-the-Date cards

It's summer and we're fully embracing wedding season here at Ministry of Craft. We party with hens most weekends at our studios (downstairs in Fred Aldous), making fancy fascinators or sewing wedding bunting, and we love coming up with new ideas for wedding-friendly crafts.  

This week I share how to make your own Save-the-Date cards with a DIY stamp.

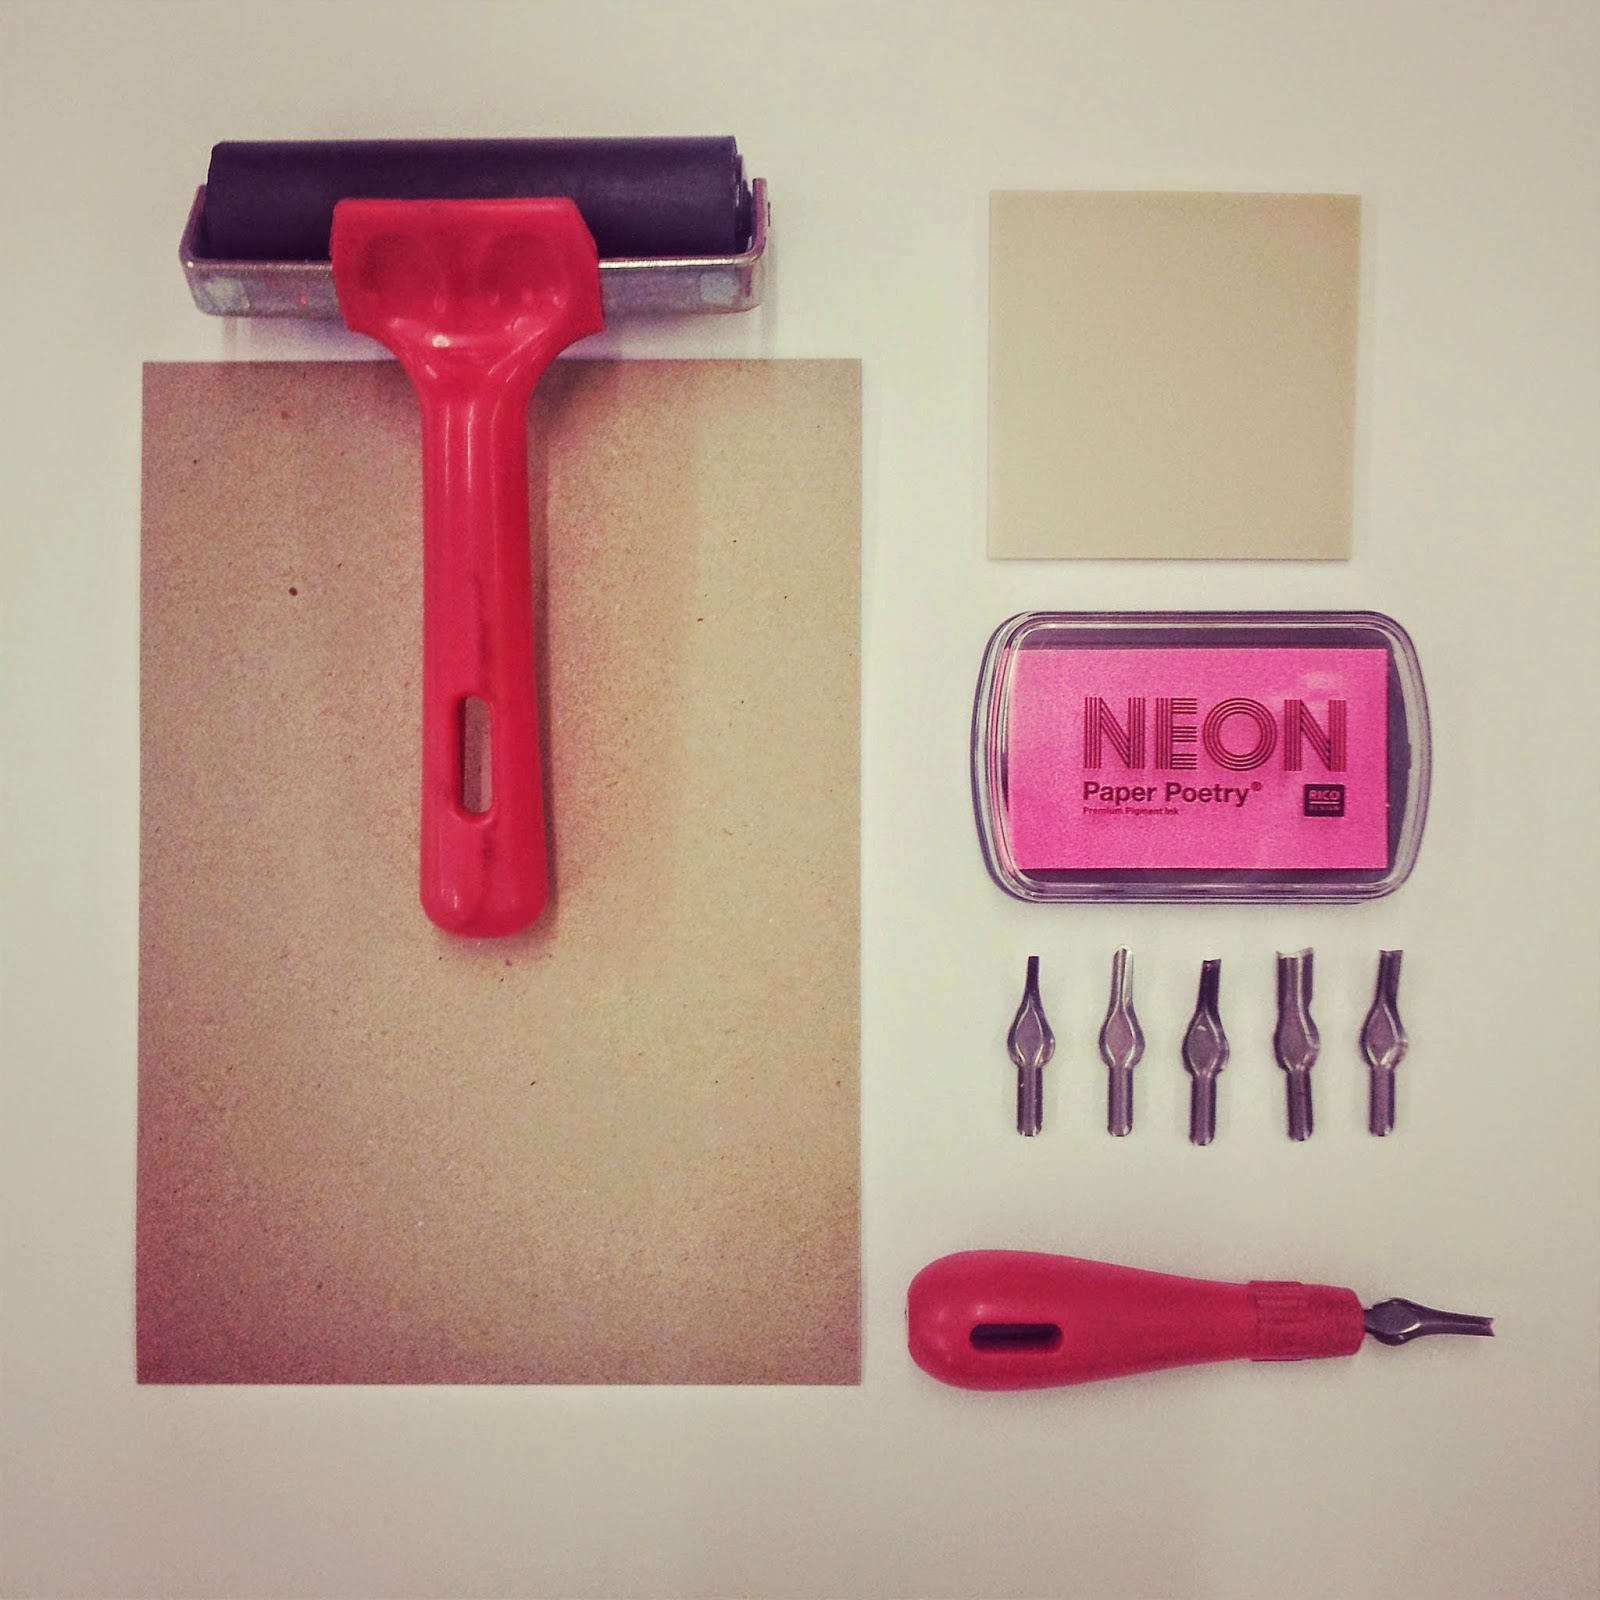
Ingredients (all bought from Fred Aldous)
Cairn Eco Craft card (I used the Fred Aldous guillotine to cut it down into individual A5 sized postcards- talk to a staff member about this service)
Paper Poetry Neon ink pads (I used neon pink, black and white inks for my project)
Lino cutting tool set
Softcut Printing block (you'll need the right size piece of lino for your chosen size of card, and I always have a spare piece of lino as I'm prone to mistakes!)
Roller


Decide on your design

I chose simple SAVE THE DATE lettering with a heart motif (already cut by our printing tutor Nell Smith) and the date.
I used a biro to mark out my designs on the surface of the lino, so I could see where to cut. If you're hand carving lettering and numbers then it's important to remember to carve them back to front. The print that you take from your stamp will be a mirror image of your block. I have fallen foul of this so many times and it is VERY frustrating!

It's also worth noting that the lino cutting tools are very sharp and it's easy to slip. Set yourself up so that you are cutting at a comfortable height on an even surface, and ALWAYS cut away from the hand or fingers that are steadying the lino. And even then, probably best to have some plasters at the ready. This is crafting at its dangerous best!

Inking and printing
When you have your prints carved and ready you can crack open the stamp pads. Press the stamp onto the pad a number of times until you can see that the surface of your print is evenly covered with ink. Then place your stamp face up on a cutting mat, or clean flat surface, and carefully place your card over the top in the required position. You don't want to smear the ink on the card at this point, so take your time. I used a spoon to 'hand burnish' over the top of the print with even pressure in small circular movements. Do this all over the print block (to take a nice even print) and then peel the card off and stand back to bask in your own awesomeness. If the print isn't that awesome then ink up again and take another print. Sometimes the ink needs to build up a bit on the surface of the stamp before it'll take a decent opaque print.
If you want to use ink from a tube, you’ll need a flat surface that you can roll ink out on with a roller. I used a Perspex sheet. When the ink is rolled out and is making a gentle hissing noise (rather than a sticky crackle) then you can use the roller to transfer the ink from the sheet onto the printing block.Roll in all directions to build up a good layer of ink. Then take your print as before, using the spoon to apply even pressure though the back of the card.

If you'd rather stamp your prints (and not bother with all this weird spooning) then you'd be better off using these very nice stamp blocks from Yellow Owl Workshop. They are more expensive but it will probably save you a bit of time. I went for the budget option: I'd rather spend the saved pennies on extra booze for the wedding.

Patience is a virtue
I printed all the 'SAVE the DATE' lettering first with white ink. And waited for those to dry while I prepared the heart. I then printed the hearts in neon pink. I then waited for those to dry while I carved the date stamp. I then overprinted the hearts with the date stamp. If I hadn't waited for the hearts to dry it would have resulted in a mucky mess. So patience is a virtue here, but the inks are pretty quick drying so it's not a big deal. Just fix yourself a cuppa, or have a gin if it's past noon. I'm really pleased with my DIY card. It's personal, fun and completely bespoke. Plus I saved £££ which I can splurge on extra wedding fizz. Or a DJ. Or a vintage photo-booth. Or karaoke!

Crafty courses and tutorials
We'll be blogging many more tutorials over the summer, so stay tuned. And if you'd like to hold your party with Ministry of Craft, hen or otherwise, then check out our party page here. Lastly, if you'd like to learn how to make lino prints (or screen prints) with the help of our lovely expert tutor, Nell Smith, then sign up for one of our next courses happening on Saturday 13 September.

Friday 6 June 2014

Pattern review - Simple T-shirt top from Great British Sewing Bee Book: Sew your own wardrobe


The recent series of Great British Sewing Bee had me glued to my seat, and following a flick through the GBSB book I immediately bought it after spotting at least three garments that would float my sewing boat, the Simple T-shirt being one of them. 
 
The T-shirt has achieved a personal best in that, the fabric was bought (at a Vintage stall) and made into something in within two weeks. I have a bad fabric-stashing habit, and the only reason it wasn't finished quicker was that the materials listed in the book were wrong, but more on that later. 


So here's how it went...

First I traced off the pattern from the pattern sheet in a Size 12, using baking paper and marked up each one, as I definitely plan to make this again.
The instructions were really straight forward and by cutting on the fold I had a front and back piece ready to stitch together after pinning.

The fabric I used was a lawn cotton with a slight 80’s twist and looked very similar on both sides making it hard to identify the right side from the wrong. I marked the initials WB for wrong back just so I didn’t sew it up wrong.


After sewing together the front and backs, I finished the seams using a zig-zag stitch and moved onto the bias binding, which I found in my stash although it could have been made from the same fabric using the instructions in the book. 

 The book dedicates a couple of pages to cutting and adding your bias binding to you project in two different ways – concealed and revealed. The methods use for the T-shirt top was the concealed method. I found the instructions useful, but it seemed to lack a few key details such as how to join the binding together! Also the length of binding in the materials list was 1.75 meters, which only covered the neckline and the sleeves, meaning I had to buy another meter to bind the bottom edge of the top.
 
The first stage of applying the binding was to unfold the folded fabric and pin  on the right side of the fabric, approx 0.5 cm away from the fabric edge to create a 1.5 seam allowance (that's the measurement between the first fold and the edge of the fabric).


Then ‘stitch in the ditch’ to attach the binding to the fabric.


Cut away the excess fabric to line up with the sewn edge of the bias binding.


The fold the fabric over to the wrong side of the fabric and pin in place, creating a neat concealed edge.


Topstitch along the neatened edge as close as you could possibly go. I found it easier to stay around 3 mm away from the edge, which was as close as I dared!


Finally topstitch the remaining bias edge down, which I did from the right side using the 1.5cm plate line on my machine as a guide, but here's what the result looks like from the wrong side.


 And there we have it a super summery T-shirt top!

Overall here's my pattern review scores:

How long did it take to make? 
 4 hours in total (over a few days)

How difficult was it? 
 Good for a beginner, as you get to use binding but you may need some extra help with the instructions.

And the fit? 
I'm a size 12, but  the neckline sits close to the edge of my shoulder and falls off. I'd cut a size 10 next time.

How does it look? 
Pretty good. I'm wearing it out tonight!