Monday 15 September 2014

Tutorial Round Up - Our 4 Fave Patchwork Tutorials

I'm starting to feel a hint of autumn on the breeze this week. I might even turn on my central heating and indulge in a spot of patchwork and quilting to stave off the wintery blues.

If you'd like to do the same, here are our favourite patchwork tutorials from our Pinterest pages...

1. Heres a very cute and easy way to start: A Quick Pieced Pincushion from Very Berry


2. Suitable for beginners and favouring the wonky 'log cabin' style we love this slick but relaxed-looking Modern Log Cabin Patchwork Pillow by Brett Bara


3. Spooktacular 'Quick and Easy' Large Hexagon Halloween Quilt from Polkadotchair

You'll need to be up to speed with patchwork and quilting terminology for this tutorial but it's a good one for testing your quilting mettle. Also very nice to see the Autumn colours of Kentucky USA!


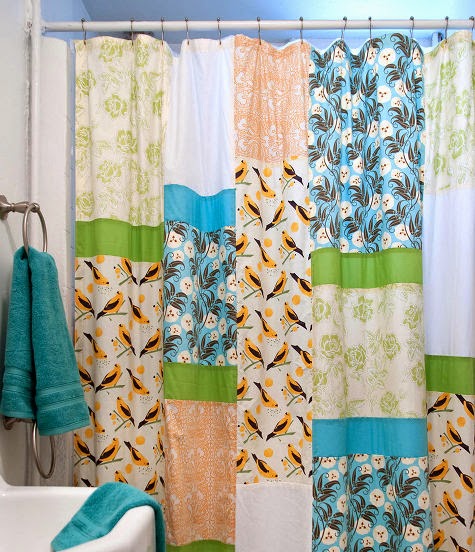
4. A shower curtain. Yes, a shower curtain. Expertly designed by Brett Bara with the intention of distracting the eye away from the rest of her grungy bathroom!


Perfect patchworking projects for Autumn. If you'd like to learn patchwork and quilting in a classroom setting, rather than from online tutorials, then check out our forthcoming Snuggle Quilt and Patchwork Bag courses here.


Friday 12 September 2014

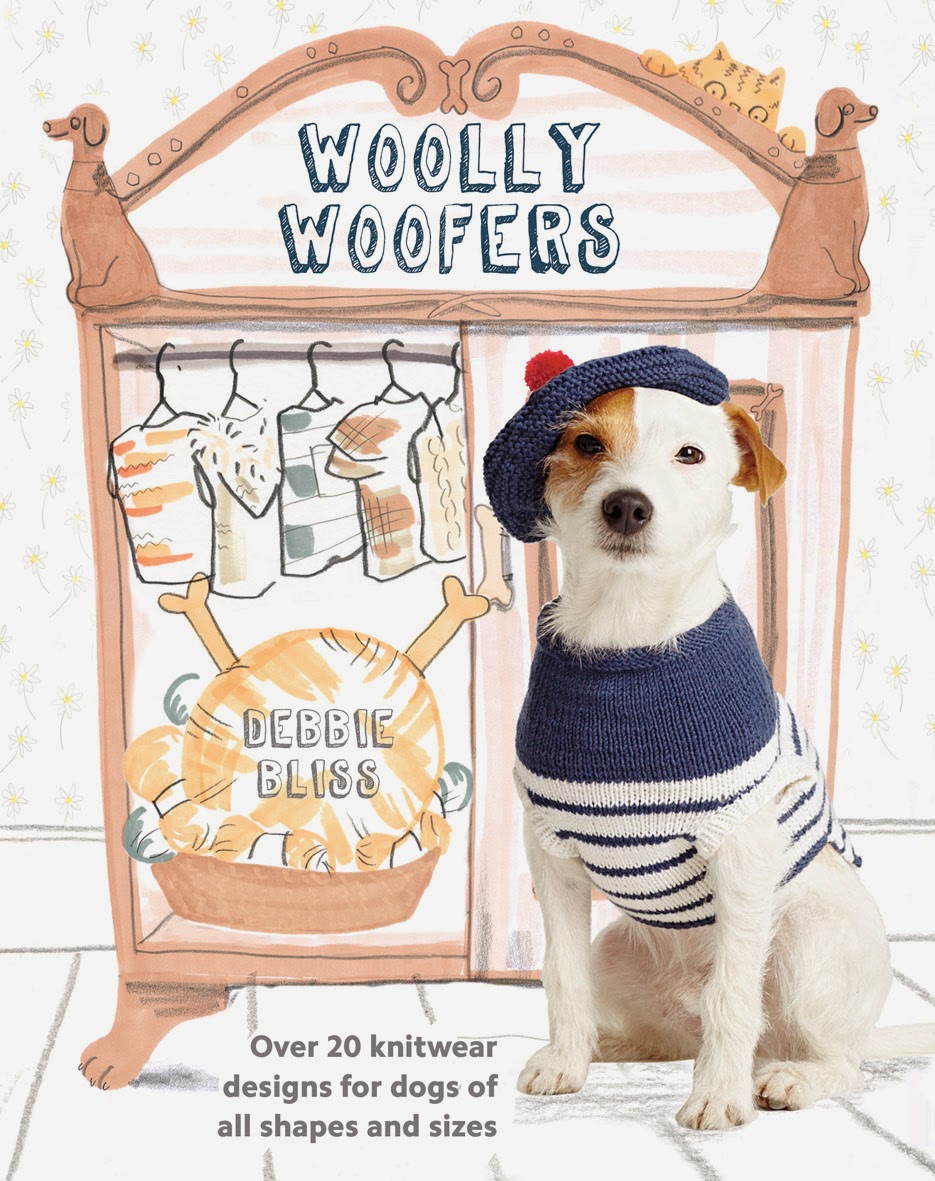
Book Review, Giveaway & Free Pattern - Woolly Woofers by Debbie Bliss (Quadrille, £14.99)

A long time ago I bought a Debbie Bliss book full of beginners knitting projects suitable for babies. I knitted a simple scarf in beautifully soft Debbie Bliss wool and my daughter still wears this scarf years later. So thank you, Debbie for igniting my passion for knitting.

And thanks to Debbie once again for her newest book launching today. I can honestly say that Woolly Woofers will have dog lovers everywhere howling with delight. Knitting for dogs has NEVER been so chic!


Woolly Woofers is a collection of over 20 knitwear designs for dogs. There are patterns for dogs of all shapes and sizes so there's something for everyone. I love this book, I don't have a dog, but I know people who have dogs, love dogs and also love knitting. And this is what I will be buying them for Christmas this year.

The book is lovely, kitsch sure but tastefully designed too, and filled with super adorable outfits to make...

...such as the colourful Mardi Gras Mutt...

...or perhaps you're more of a Puppy Polo...(I would wear this myself)...


...please someone, ANYONE, make the Pierrot Hat and Ruff. I guarantee that if you make these for your pooch and take him for walkies you will be treated as a celebrity. It must be knitted up instantly.


To celebrate the launch of Woolly Woofers by Debbie Bliss, the lovely publishers Quadrille, have given us a copy to give away. If you'd like to get your paws on a free copy just follow the link here. I'll draw a name out of a hat next Friday (19 September), and announce the winner.


We're also encouraging everyone to share photos of their dogs in their new outfits using the hashtag #WoollyWoofers. If you'd like to road-test one of the patterns from the book we have an exciting, exclusive FREE DOWNLOAD of the ever so tasteful Good Boy Gansey cabled coat. You lucky mutts!


If you're a novice knitter and you'd rather learn the basics first, then why not come on one of our beginners knitting courses, taught by the super awesome Rachael Gwilliam (Art Yarn)? Check them out here.

Now go forth and spread the word! Download the pattern! Enter the give away! Buy the book! Share your photos!

And enjoy your weekend.


Woolly Woofers by Debbie Bliss (Quadrille, £14.99)
Photography: Richard Burns

Friday 5 September 2014

Ministry of Craft Tutorial - DIY toadstool wedding cake toppers


This summer I had the pleasure of tutoring a wonderful woodland wedding themed hen party. We made these cute toadstool champagne cork toppers which will be used at the wedding venue as place card holders, wedding cake toppers and even favours. We made loads in one go, you can do the same or just make a couple. You’re only limited by how much champagne you can drink!


Here’s how you can make them yourself at home:


Ingredients:
Champagne corks
Red acrylic paint
White acrylic paint
Kebab sticks or similar
Medium sized paintbrush with flat head
Thin paintbrush with rounded head
Stiff wire
Wirecutters
Natural craft card
Black Sharpie marker
Scissors or craft knife
Glue


Ready Steady Go!
After polishing off a few bottles of your favourite fizz (well, it would be rude not to) steady your corks by inserting your sharp kebab stick firmly into the end, as shown. This will allow you to paint all the way round without touching the cork with your fingers.

Squeeze a small amount of each paint into separate receptacles. Don’t add any water to your paint or brush, you want the paint to be as thick and opaque as possible. Using your round headed brush paint the bottom of the cork with the white acrylic paint to create the ‘stalk’. Spread the paint as evenly as you can and avoid blobs of paint which will take ages to dry. When you have finished use a milk bottle or similar to stand your cork in while it dries. Leaving each colour to dry completely is crucial so that you don’t accidentally mix the paints together. You don’t want red and slightly pink toadstools!


Next, using your flat headed brush, paint the top part of the champagne cork with the red acrylic paint, taking care to make a neat line where the red meets the white. And then leave it to dry.


Watching paint dry
In the mean time you can make name cards or flags to go into the top of your toadstools when they are finished.

I made mine by cutting a flag shape out of some natural craft card and gluing it to a 2 inch length of stiff wire. You could make yours in any shape you like but they work best when they are double sided and the end of the wire is sandwiched between them out of sight. This way they look good from all angles too!


Autumnal cheer
When the red paint is totally dry, use the round ended paintbrush again to add polka dots of white paint all over the top of your toadstool. Be generous with the white paint here. It looks good if the spots have a bit of texture to them!

­­


Again, wait for them to dry completely before man handling them and adding the flags or name cards.

The finished toadstools will add a bit of fun and colour to your wedding banquet, tea party or cake stall.


If you’d like Ministry of Craft to run a workshop for your hen do, party or corporate event then check out our party page and get in touch. If you’d like to share photos of your makes you can join us on facebook , twitter, pinterest and instagram. Don’t forget to tag us in your posts and use #ministryofcraft so we can see what you’re all doing!

 Bottoms up!